

Last year, I fell in love with a book another blogger featured--Hoop-La by Kirsty Neale so I knew this year I wanted to feature something from it since this blog hop is where I first heard of the book. It's a great book filled with "100 things to do with Embroidery Hoops" including tooth fairy pillows, bird mobiles, mixed media designs and actual embroidery designs. Kirsty does a great job of explaining each project with helpful hints into the craft involved and cutesy ideas with each design.

With fall not too far away (I hope!!), I chose the apple hoop (pg. 18) to make to add to my fall decorating.

Awhile back my sewing room was a
I couldn't bear to throw it away though, so I saved it to make hoop art with at a later date. Perfect for this project! I heavily glued the hoop back together since I was going to cover it anyway and it wouldn't affect my project and set it aside to dry.

Usually I find inspiration in craft books, but don't necessarily copy straight from them. I'll find something I like and use that as a starting point, but I loved that the book apple used both green and red buttons. My kids are very specific about their favorite kind of apples, so I thought it would be cute to use both green and red, with a touch of yellow thrown in too.
I used both vintage and cheapy plastic buttons from Walmart on this project and found they worked together perfectly. On a side note, I think this would be so fun to do with kids, using glue instead of needle and thread. It's the kindergarten teacher coming out in me again--all that sorting and fine motor skill action. lol
At any rate, traced the pattern from the book onto my chosen background fabric and started laying out buttons until I was happy with the design. Then I basted them down with some regular school glue to keep my design intact while I started sewing.
 |
| You can see here if you look closely that I didn't necessarily stay in my template lines--going for a more abstract apple to fit my buttons. You can see the stem and leaf outlines as well. |
I did sew each button down, but you could just use glue. I like the extra hand-made touch the sewing gives and it didn't take long at all. After I finished, I thought the bare spaces could use a little something so I added a few more buttons on a second layer to help.
Then I glued down small pieces of felt for the stem and leaf and the apple art was done. But I still needed to cover that glued edge and make the hoop a little prettier so dug out some old red Homespun Yarn I've been hoarding and quickly wrapped the outer hoop.

And voila--done in no time at all. It honestly took me longer to decide on a project and gather my supplies than it did to make this cute hoop that's a small, homey addition to my fall decorating. I do think I'll go back and embroider some text, but haven't decided for sure what I'd like to write. I'm thinking something in cursive to go with the flowy background--maybe just apples, maybe apples written in different languages... Ideas??

I've teamed up with some fabulous bloggers who will be showing off their projects made from craft books, all month long!
Monday 9/1: Fabric Mutt / Lindsay Sews
Tuesday 9/2: Rae Gun Ramblings / Craftside
Wednesday 9/3: The Feisty Redhead / The Fabric Studio
Thursday 9/4: Marci Girl Designs / Small Town Stitcher
Friday 9/5: LRstitched / A Prairie Sunrise
Monday 9/8: Hopeful Threads / sewVery
Tuesday 9/9: 13 Spools / Lisa Liza Lou
Wednesday 9/10: Stitch This! / My Sewcial Hour
Thursday 9/11: The Littlest Thistle / Fabric Seeds
Friday 9/12: Sew Sweetness / Clover + Violet
Monday 9/15: Inspire Me Grey / amylouwho
2) Your craft book project must have been completed in 2014.
3) Create a new blog post, instagram or Flickr photo (dated September 1, 2014 or later) and link back to Craft Buds/Craft Book Month in your post or photo description (tag #craftbookmonth for instagram). In your post or photo description, make sure to list the craft book you used and provide a link if possible.
4) All winners chosen via Random.org. Some prizes available to international winners, so please join us!
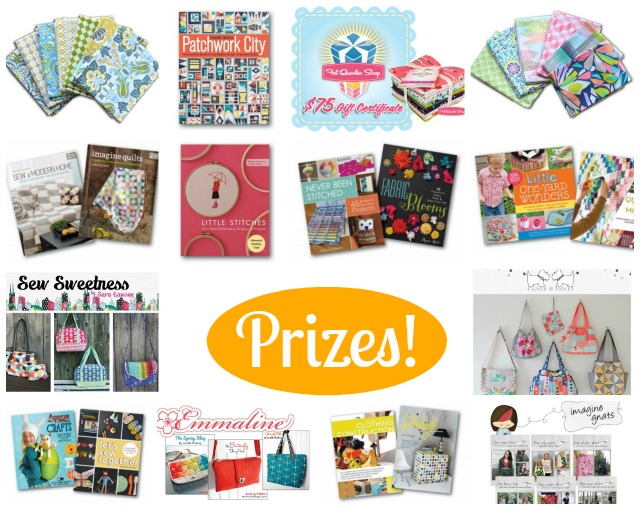
Visit Craft Buds and link up your craft book project during the window of Sept 1-30 and you'll automatically be entered to win some fantastic prizes from the Craft Book Month sponsors!
Tuesday 9/9: 13 Spools / Lisa Liza Lou
Wednesday 9/10: Stitch This! / My Sewcial Hour
Thursday 9/11: The Littlest Thistle / Fabric Seeds
Friday 9/12: Sew Sweetness / Clover + Violet
Monday 9/15: Inspire Me Grey / amylouwho
Link Up
The girls at Craft Buds want to see what you're making too, so they're hosting a giveaway this month. Link up your craft book project at Craft Buds from your blog, instagram or Flickr account, and enter to win prizes. To participate in the month-long contest, just link up any project you've made from a pattern in a craft book. That easy! You'll tell us a little about the book, the project, how you personalized it, etc. Winners will be announced on Wednesday, October, 1!Rules
1) One entry per person.2) Your craft book project must have been completed in 2014.
3) Create a new blog post, instagram or Flickr photo (dated September 1, 2014 or later) and link back to Craft Buds/Craft Book Month in your post or photo description (tag #craftbookmonth for instagram). In your post or photo description, make sure to list the craft book you used and provide a link if possible.
4) All winners chosen via Random.org. Some prizes available to international winners, so please join us!
Visit Craft Buds and link up your craft book project during the window of Sept 1-30 and you'll automatically be entered to win some fantastic prizes from the Craft Book Month sponsors!


