Pages

Showing posts with label finished. Show all posts

Thursday, September 4, 2014

Craft Book Month Blog Hop

It's Craft Book Month and sweet Lindsay from Craft Buds asked me to participate again.

Craft Book Month

Last year, I fell in love with a book another blogger featured--Hoop-La by Kirsty Neale so I knew this year I wanted to feature something from it since this blog hop is where I first heard of the book.  It's a great book filled with "100 things to do with Embroidery Hoops" including tooth fairy pillows, bird mobiles, mixed media designs and actual embroidery designs.  Kirsty does a great job of explaining each project with helpful hints into the craft involved and cutesy ideas with each design.


With fall not too far away (I hope!!), I chose the apple hoop (pg. 18) to make to add to my fall decorating.


Awhile back my sewing room was a total mess bit messy and I accidentally stepped on and broke a wooden embroidery hoop that had fallen out of my embroidery supplies bag.  No worries, the only injury was to the hoop.  :)

I couldn't bear to throw it away though, so I saved it to make hoop art with at a later date.  Perfect for this project!  I heavily glued the hoop back together since I was going to cover it anyway and it wouldn't affect my project and set it aside to dry.


Usually I find inspiration in craft books, but don't necessarily copy straight from them.  I'll find something I like and use that as a starting point, but I loved that the book apple used both green and red buttons.  My kids are very specific about their favorite kind of apples, so I thought it would be cute to use both green and red, with a touch of yellow thrown in too.

I used both vintage and cheapy plastic buttons from Walmart on this project and found they worked together perfectly.  On a side note, I think this would be so fun to do with kids, using glue instead of needle and thread.  It's the kindergarten teacher coming out in me again--all that sorting and fine motor skill action.  lol

At any rate,  traced the pattern from the book onto my chosen background fabric and started laying out buttons until I was happy with the design.  Then I basted them down with some regular school glue to keep my design intact while I started sewing.

You can see here if you look closely that I didn't necessarily stay in my template lines--going for a more abstract apple to fit my buttons.  You can see the stem and leaf outlines as well.

I did sew each button down, but you could just use glue.  I like the extra hand-made touch the sewing gives and it didn't take long at all.  After I finished, I thought the bare spaces could use a little something so I added a few more buttons on a second layer to help.

Then I glued down small pieces of felt for the stem and leaf and the apple art was done.  But I still needed to cover that glued edge and make the hoop a little prettier so dug out some old red Homespun Yarn I've been hoarding and quickly wrapped the outer hoop.


And voila--done in no time at all.  It honestly took me longer to decide on a project and gather my supplies than it did to make this cute hoop that's a small, homey addition to my fall decorating.  I do think I'll go back and embroider some text, but haven't decided for sure what I'd like to write.  I'm thinking something in cursive to go with the flowy background--maybe just apples, maybe apples written in different languages...  Ideas??


I've teamed up with some fabulous bloggers who will be showing off their projects made from craft books, all month long!

Monday 9/1: Fabric Mutt / Lindsay Sews

Tuesday 9/2: Rae Gun Ramblings / Craftside

Wednesday 9/3: The Feisty Redhead / The Fabric Studio

Thursday 9/4: Marci Girl Designs / Small Town Stitcher

Friday 9/5: LRstitched / A Prairie Sunrise
Monday 9/8: Hopeful Threads / sewVery

Tuesday 9/9: 13 Spools / Lisa Liza Lou

Wednesday 9/10: Stitch This! / My Sewcial Hour

Thursday 9/11: The Littlest Thistle / Fabric Seeds

Friday 9/12: Sew Sweetness / Clover + Violet

Monday 9/15: Inspire Me Grey / amylouwho

Link Up

The girls at Craft Buds want to see what you're making too, so they're hosting a giveaway this month. Link up your craft book project at Craft Buds from your blog, instagram or Flickr account, and enter to win prizes. To participate in the month-long contest, just link up any project you've made from a pattern in a craft book. That easy! You'll tell us a little about the book, the project, how you personalized it, etc. Winners will be announced on Wednesday, October, 1!

Rules

1) One entry per person.

2) Your craft book project must have been completed in 2014.

3) Create a new blog post, instagram or Flickr photo (dated September 1, 2014 or later) and link back to Craft Buds/Craft Book Month in your post or photo description (tag #craftbookmonth for instagram). In your post or photo description, make sure to list the craft book you used and provide a link if possible.

4) All winners chosen via Random.org. Some prizes available to international winners, so please join us!
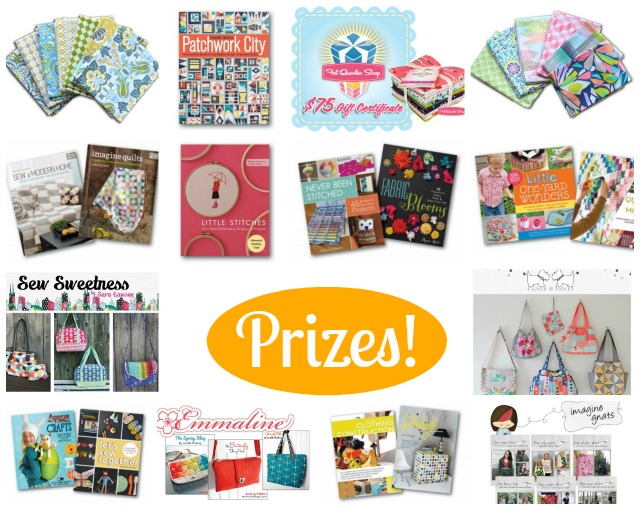


Visit Craft Buds and link up your craft book project during the window of Sept 1-30 and you'll automatically be entered to win some fantastic prizes from the Craft Book Month sponsors!

Craft Book Month at Craft Buds

Monday, September 1, 2014

More selfish sewing done!

Happy Labor Day to my American friends!  And so marks the end of summer and beginning of fall.  Only someone forgot to tell Mother Nature because we're having summer weather with no end in sight.  ;)  Oh well, I'm sure we can all enjoy our pumpkin-spiced everything in the air conditioning.

As I mentioned last week, I pattern-tested for Jenny again, making her Split-Neck Raglan Top.  It's so cute!  I, for lack of time, kept the neckline of my shirt rounded instead of the cute v-split she shows, but I still think the top is great.  She includes 3 sleeve lengths, different finishing ideas, and lengths for petite, regular, and tall hem-lengths.

One thing about pattern testing, is that you don't always come out with the perfect fit.  As Jenny is teeny-tiny herself, she has to use formulas and experience to know how big to size up a pattern for each gain in size and sometimes, it just doesn't' work right.  I'm a consistent large-medium or smaller-large, meaning my measurements call for a large, but I can often wear a medium with no trouble.  


So on this pattern, I cut just larger than the medium lines knowing that the top was not fitted so I'd have a little extra room.  But it ended up being too large for my taste.  Chris said it looked fine, but I felt like I was wearing a scrub top.  A beautiful one, but still...  It just wasn't quite what I wanted.


  So I played around with some ideas to bring in the width and tighten the neckline up a bit.  I'd have loved to do pintucks across the front, but really didn't want to take the bias binding all the way off the neckline to pin-tuck it and then put it all back on again.  ;)

I decided to go with a simple pleat to just bring it in a bit.  I actually took both sides in a good inch, removing about 2 inches from the neckline and probably could have adjusted a little more, but I feel like this is good enough for now.

This is me with no makeup, & wet hair from the shower--see what I do for y'all!  :)

The shirt is still a bit large everywhere for my taste, but it's done and I think it's going to stay that way.  I think it'll look great under a cardigan all fall & winter, and it's so light that it'll work perfect now for these steamy days we're still having.


The fabric is a Kaffe Fasset voile I bought a few years back to make a dress with.  I finally got around to said dress this summer before our Bahamas trip and ended up hating it.  I couldn't just toss such pretty fabric, so I re-purposed it for this top.  It's so buttery and light.  A joy to wear.

Jenny has taken the pattern in quite a bit to tighten up the neckline and width and the pattern is now for sale if you're interested.  I get no profit from telling you about her patterns, she's just a great person who makes easy-to-follow and cute patterns for women and kids and I love to spread the word about things & people I think are great.

So, have you ever pattern-tested?  What were your results?  Have you ever tested/made something that came out just awful?  What did you do?  Toss it?  Fix it?  Re-purpose it?

Monday, August 4, 2014

Selfish Sewing done

So I finished up the shorts from last week.  They were really quite simple.  It took me longer to get photos of them than to make them for sure.

I'm not thrilled with any of the pictures, but...as my friend Mindy reminded me, we are our own worst critics.  So here goes:

I sewed these up with a cotton blend that had a slight stretch to them and a heavy weight.  It was perfect for these shorts.   The weight of the fabric really holds the shape of these shorts well and adds to the "dressier" look of these shorts.  I was hoping for a pair that could easily be dressed up or down and I think I've got that with these.


 The directions were easy to follow and quick to sew up.  I do want to go back and add pockets to these as I left them out since I was pattern testing.  I've even got them cut out and ready to add.  I originally cut the 6-inch inseam length on these shorts.  But once I got them made I felt that was too long so I turned them up about 1 1/2 inches for the hem.  Perfect.


Funnily enough, I had Chris take a few pics of me on our front porch in these shorts and just felt the lighting was terrible so I said we'd just redo them Saturday morning before my nephew's birthday party.  And after looking at all the pics, I ended up liking those original pics the best.

Does anyone remember the scene from the movie Clueless when she takes pictures of her outfits because she says they're better than just looking in the mirror.  I always think of that when I have Chris photograph me in outfits.  I would have sworn I liked the blue shirt better but after looking at the photos--the green shirt wins.  :)

Next up is some sashing strips from Oren's (never-ending) Star Wars quilt and a quick skirt for Emma for back to school.  Then I'm going to do some more selfish sewing and whip up those seersucker shorts for me too.  :)

Saturday, February 15, 2014

The Rising Sun Challenge

Nat and Lucy are so good about giving out interesting topics for Le Challenge each month.  If you've never heard of this, it's a blog that two friends started with the sole purpose being to challenge themselves and friends to think of and make something new each month based on a theme.  There's no competition, it's open to anyone who wants to participate, and one lucky participant is awarded a gift each month based on a random drawing.

Le Challenge

This month, the girls chose "The Rising Sun" which I thought it was an interesting starting point because there were so many places to go with that topic.  I searched rising sun quilt patterns and there were plenty of really neat blocks that would make awesome quilts.  But I didn't leave myself enough time for that.

So I thought about the suggestions they and their guest bloggers had given--Japanese-influenced designs for garment sewing or quilting; Japanese fabric designers from traditional designs to Lecien and kawaii cuteness; Sashiko or even just sunny projects.

My ever growing "to-do before I die" list grew leaps and bounds.

But in the end, I googled Rising Sun images and I knew what I was going to make.

I found this image on zazzle's web site and loved the combination of the rising sun and the clamshells, a traditional quilting design.
But I didn't love the red.  It was WAYYY a little too Japanese for my style and wouldn't fit into my decor. So I changed it.

I have always loved the song You are my Sunshine and often sang it to my children when they were younger.  I thought the lyrics would fit well here, so I used my favorite colors, a great, fun font and here you go:


I created an aqua background and then put a somewhat-transparent layer of gray canvas over it to soften the aqua and bring the gray theme into play.


Then I added the lyrics to the song in yellow and worked on the graphic.  I deleted all of the white background and then changed the entire graphic to be yellow.  After duplicating the image, I changed it to gray and then erased the top layer (the gray) away from the "rising sun" portion of the image.

Do the pics look a little fuzzy to you?  They don't at all in my editing software but do a little in blogger...weird!
Then I printed it in a 5x7 size and popped it in this frame.  I will DEFINITELY be painting the frame, but it's what I had handy.  I'm working on building a gallery wall in my living room of pictures, inspirational quotes, and images that are important to our family or just make me smile.  The photos are all framed in black, but I'm hoping to bring color in through the other items.

I think this will be a perfect addition.  What do you think?

Thanks girls for the challenge!  It was fun.  :) Head over and see what everyone else created this time.  :)


Friday, February 7, 2014

Friday Finish

Actually I finished this quilt a couple of weeks ago, but since no blogging or photographing was done since I hurt my back, I'm just getting to showing this off.

Last year, I asked the Empower Circle of do. Good stitches to make me blocks featuring rectangles and squares.  We're a busy group made up of some of the sweetest women you'd ever want to meet and I figured this would be simple and creative for the girls.

I gave them this color palette and asked them to sew up whatever they wanted using straight lines--no wonkiness.

ColorSparkle
via design-seeds.com

They all rolled in and I knew that once I'd gone out on a limb colorwise, I needed to go out on a limb with the construction of this quilt as well.  So I decided there needed to be a lot of negative space in this quilt.  I can handle asymmetry but have had trouble with negative space in the past.  It feels like I just didn't finish and I need to do more.  But I thought these blocks were strong and could support the negative space.


After questioning myself for some time, I ordered some purple, laid them out and went for it.  Once pieced I wasn't sure how to quilt it other than I knew I wanted it done and sent off to comfort someone instead of sit at my house any longer.

So I free-motion-quilted loops all over.  It's been some time since I FMQ'ed anything and I had always thought my machine really didn't like FMQ.  I'm still not convinced it does, but I realized that a lot of the issues were with me and how I was moving the quilt.  I still had a lot of thread breakage (and if anybody has suggestions on why my top tension gets so tight my thread breaks I'm all ears) but the "eyelashes" got better and I figured that Rome wasn't built in a day and neither would I be good at FMQ that fast.

This quilt is far from perfect.  In some places on the back, the eyelashes are bad.  In some places my loops are less loopy and more shaky.  In some places I backed myself into corners and had to cross lines or quilt close together.


But the quilt police will not come after me and take this quilt or me to jail.  Life will continue and while the quilt is not perfect--neither is the quilter.  I decided it was a lesson in life.  I'm sending this quilt to an organization that teaches girls and young women to be strong, to never give up on life.  I'm giving this quilt to a young lady who needs to know that through obstacles and imperfections, life keeps going.  That when things look tough and you want to quit, there is another imperfect young woman out there who sends her love--a whole group of us that keep trying and keep going each day.

Isn't that what do. Good stitches is about?  Aren't we trying to help others as we grow as quilters and as people?  I'm not excusing my mistakes and saying I don't want to get better.  I'm getting better as I share, as I grow, as I work through life's imperfections.  I'm saying it's okay to be less than the best, but it's not okay to give up.

I hope the recipient of this quilt feels every bit of that.  I hope she knows that the hardest part of every battle is going forward when it seems too hard.  I hope she knows there are those of us out there that care and that we're all going through battles, big and small.  Let's fight those battles together.  :)

Friday, January 10, 2014

Finish it Up Friday

One thing I love about the online community is the chance to learn from others.  While I learned to sew and many techniques from my Mom, my 4-H leader and classes I took, most of what I've learned about quilting has been from online friends, online classes and reading books on my own.

Being able to communicate with others and learn from others is such a blessing to me since I have few local friends who sew at all and none that quilt.  

Case in point?  Sizing of blocks.

Nicole asked us to make the lovely kaleidoscope blocks that I mentioned on Monday.  I printed off one and measured it and it was thisclose to 1" square so I printed out 7 more and cut them all out.  But then I noticed in our online discussion board that many mentioned sizing difficulties when printing.  So I went back and measured the cut-out foundation and it was 7 inches!  If I'd been on my own, I'd have made Nicole blocks that she wouldn't have been able to use because they'd have been a half-inch wide all the way around.

Thank goodness for community and me reading before I got busy sewing.  See, procrastination does help out sometimes.  ;)

I ended up copying the template and opening it in photo-editing software where I could manually size it to print out at exactly the size I wanted.  It worked out perfectly.

And here are my two kaleidoscope blocks for Nicole.  I really want to just keep them and tell everyone in the group that Nicole moved and have them send her blocks to my house.  ;)  I won't of course, I'll just add this to my never-ending list of quilts I'd like to make. 


And that's what I finished up this week.  Next on my list is to quilt my purple do. Good stitches quilt.  I've just got to sweep my kitchen first so I can lay it down to baste it.  

What are you up to this week and weekend?  Any big plans?  We're taking it easy after the first week of school and before softball gets cranked up for Chris. I'm planning on doing some more conquering of clutter that's been hanging around and trying to get that quilt finished up.  Wish me luck. 

Linking up with Amanda Jean.

Friday, January 3, 2014

Fightin' Irish Chain Finished

So I did manage to complete the Fightin' Irish Chain I made for my Dad for Christmas this year.  I showed progress (and my doubts about finishing in time) before, so here's the nitty gritty details and some pics to show it off.

I used Dana's EXCELLENT tutorial for a Double Irish Chain quilt except I made it smaller with only 56 blocks in the quilt.


I ordered the navy for the solids and it's actually Kona Nautical but the greens and yellows (on the front and back) are all from my stash.  It was kinda neat to use all of these fabrics that I'd used to make things for people in our family or friends and show them to Dad. Another connection through quilting.  ;)

The quilt measures about 70" x 80" making it one of the biggest quilts I've ever made.  I almost gave in and made it smaller a few times, but Chris reminded me every time that big guys need big quilts and my Dad wouldn't want just a little lap quilt.  And he's right, I'm glad I stuck it out and finished this one at the planned size.


For the back I just pulled a bunch of green and yellow scraps.  I'd accidentally cut a few too many navy and yellow strips and squares for the "B" blocks of the quilt so I pieced some of those together and then just filled in with yardage and pieces of stash.  You can't necessarily tell in the picture but most of the yellows on the back aren't solid but small patterns.  I really loved the back.

I machine-embroidered a little shamrock to one of the open squares.  I just wanted to add that little extra touch.  

For quilting, I just sewed diagonally through the green and yellow blocks.  It actually shows up better on the back, making a diagonal grid.  Because of my deadline (I had to have it finished by December 20), the lines aren't quite as straight as I might like but again Chris reminded me that my Dad didn't give a hoot if the lines were straight or not.  Again, he's right.

I used a navy binding and hand-sewed it to the back of the quilt in the car during the 16-hour drive (over 2 days) to my Grandparents' house for the holiday.


My Dad did love it and my hope is that it brings him comfort and warmth.  May he know how much I love him and appreciate all that he's done for me in this small gift I've made for him.  :)

I would definitely make this pattern again.  Double Irish Chains are both classic and visually stimulating.  The simple design makes it great for using up scraps and the way the quilt comes together almost magically makes all the strip piecing and pressing and cutting seem worth it in the end.  Definitely check out Dana's tutorial if you're interested in making this quilt.  And she is by no means compensating me for my raves about it, I just like to pass on good tips and tricks when I find them.

I'm linking up with Amanda Jean for Finish it Up Friday.

Tuesday, December 31, 2013

Goodbye 2013!!

Goodbye to a great year!  While 2013 wraps up, I think back on all that went on this year.  We stayed busier than ever before which is a trend I see increasing in the next 10-15 years for our little family and that is a good thing I guess.  It means we're living our lives and trying new things and actively using each day here on Earth.

I think I made progress on my word(s) of 2013, which I actually had to look up, so saying I've accomplished Balance would be a lie, but I hopefully get better as I get older, so maybe one day...  And I definitely added More, but I'm not sure how much more was sewing/crafting/creating and how much more was life.  ;)

In 2013, I finished:
  •  7 quilts
  • 2 quilt tops waiting on basting
  • nearly 25 bee blocks or shared projects

  • 10 dresses/skirts/scarves/etc
  • a few projects (zip pouches, pillows, gifts, etc)

left 3 quilts as WIPS, AND ran a half marathon, got a new puppy, attended nearly a half million softball practices and karate and dance lessons (or it felt like it), vacationed, dealt with the never ending broken arm saga of Oren, welcomed my nephew to our family, took over as PTO president, ran a few 5Ks with my family and saw Chris honored as Teacher of the Year and as a Distinguished Educator from the University of Florida.


I'm calling 2013 a success.

Most of all though, I'm just thankful.  Thankful for all of y'all and the friends I've made here in blogland and through flickr and instagram.  Thankful for friends who get why sewing is important--how creative thoughts and acts make us better people.  How making things that serve both artistic and practical purposes can save your sanity.  :)

What are you most proud of in 2013 and what are you taking away from it?

Happy New Years Eve everyone!  May your evening be safe, fun and a great send-off to the last 365 days we've had!

Thursday, October 24, 2013

Another Random Thursday

I may not always have time to sew, but I always have time for Random apparently...

  • Athena performed yesterday and then acted in a play tonight about Hatsheput, the first female Pharoah.  I'll have pictures tomorrow.  She did so great!!
  • The kids and I ran a color run this past weekend.  Where volunteers literally chuck colored corn starch at you while you run.  Sounds weird--but tons of fun.  Poor Emma was sick with a stomach bug but wanted to run so badly that she ended up puking about halfway through (we'd been walking for almost a mile anyway) and couldn't finish.  But Oren and I did.  It was kind of a let-down when Chris and Em were already in the truck by the time we finished, but we still had a lot of fun.


  • I finished up my bee blocks for Katie today.  She asked for Rugby Stripe blocks via Alex's tutorial.  She's making quilts for her nephews for Christmas and asked us to help out.  Now I want to make an orange and blue quilt for Oren's bed like this.  I looked at everyone else' photos and my blocks are way scrappier than the rest...hopefully they won't stand out too much in the quilt.  I hate that when you question what you've made afterwards by comparing it to others...  Comparison is the thief of joy you know.
Better pictures to follow tomorrow

  • On a lighter note--I got my hair cut yesterday.  And when I say cut--I mean cut--like inches and inches cut.  I am never afraid of change with my hair because it grows pretty fast and I really trust my hairdresser.  Is that correct terminology--hairdresser?  I kinda feel like an old lady when I say that.  Is stylist better?  Anyway, I showed her these pics and told her to go for it.

This color

with

Layered shoulder length hair with bangs... this is almost exact to how I had mine done! I love it!
this cut

Here's what I ended up with...

I am not the queen of selfies.  In fact, I am like the anti-selfie-taker.  I cannot successfully take a good picture of myself!!
  • I think I'll actually like it even more as it grows out, so fingers crossed this style works for me for awhile.  I think so.  Also, sometimes I dye my hair dark about this time of year, but decided to go with a darker blonde this year for now.  I read that honey and caramel blondes are where it's at right now--and you know me--shades of hair color named after foods--I'm on that.  It's not near as dark as the picture I took in to show, but I do like it.  I can always darken it as we get farther into fall and winter.
  • Now I'm working on fall-inspired blocks for Shannon and our Empower circle of do. Good stitches.  She told us "Fall...go." well, a little more than that, but in a nutshell.  Our circle is great about trusting each other and being creative which I love.  We've done many quilts with a general idea only and come up with amazing results.  I couldn't have asked Rachel to put me in a better circle of friends and quilters.
Any guesses on what this will be??

  • Last Friday Oren and I went on a field trip to a local (generally-speaking--it was about 45 minutes away) farm that has an awesome fall pumpkin patch and corn maze.  They had all kinds of fun things for the kids to do and they had a ball.  I got some great pictures of their flowers since I did nothing with my yard this year and have only weeds to show for it.  

Zinnias are my favorite.


And the fields of sunflowers...be still my heart!!


  • When I finish up these blocks for Shannon, I've got my d.Gs quilt from May to finish piecing the top for.  I had to wait on some solids and then lost my mojo, but I feel it coming back to me...  And then I'm starting a project for my Dad for Christmas.  I wish I had a day or two with nothing but sewing hours in them...

Phew..that's plenty of random and more pictures than you really needed, but I sure feel better.  I'm linking up with Cindy and her awesome randomness.

Really Random

What have you been up to lately??

Saturday, September 7, 2013

Craft Book Month Blog Hop--My Fall Patchwork Pillow

Hello to any new readers!  I'm Kelli and welcome to my little corner of the world.  I was so excited when Lindsay asked me to participate in this blog hop.  I have a small stack of crafty books just waiting for an excuse to make something out of them!

Craft Book Month

I chose to work out of the book Pretty in Patchwork Holidays by John Q. Adams.

Pretty in Patchwork Holidays

 I bought this book last year and then promptly got busy and forgot to make anything out of it.  Not this year, my friends.  This book is filled with great projects that are both cute and fun to decorate your home with.

I chose to make the Holiday Surprise Reverse Applique Pillow by Angela Mitchell who is a star in her own right.  She's got such a great sense of style that I was sold at once.

Early pics!
photo found here

Only one problem--it's not even pretending to be time for Christmas decorations.  I mean, it's 91 degrees here in Florida this afternoon.  And I wanted something I could enjoy now!

So, I took Angela's pillow and modified it.  I changed the Christmas tree template to a leaf and I changed the green patchwork to more fall colors.


I love it!

I'd done reverse applique before and it really is quite a simple concept, but the results are stunning!  If you've never done reverse applique, you layer your base fabric over your design (in this case the patchwork) and then after sewing your desired shape, you cut away the base fabric to reveal your design.


I keep a scrap bag with just 2.5" squares and strips in it, so I dug through it to find scraps that screamed fall to me.  Originally, I added a few more colors in but my helpful husband guided me toward more yellows and oranges.  He wasn't a fan of the turquoise at all, but I think it makes the other colors pop so well and being perfectly honest--it's my favorite color so I try to add it in any place I can.  ;)


I mean, it's going on my couch, right??  Why not add in something special?


I only have one problem with this pillow...now I want more!  I want to line my couch with fall-inspired pillows!!  This little beauty needs some friends.  He's so lonely down there on the end of the couch by himself.

So I'm off to dig through the scrap bag again to make him some friends.  But rest assured, come winter, I'll be making this pillow again only using Angela's Christmas tree design...finally!

The girls over at Craft Buds are spreading the Craft Book love this month featuring different bloggers each day and offering prizes for anyone who links up a project made from a craft book this year!

Blog Hop

Week One

Monday 9/2: Fabric Mutt / LRstitched

Tuesday 9/3: Stitch This! The Martingale Blog / Stitched in Color


Wednesday 9/4: Fabric Seeds / Pile O Fabric

Thursday 9/5: The Feisty Redhead / Rae Gun Ramblings

Friday 9/6: Sew-Fantastic / Clover + Violet

Saturday 9/7: A Prairie Sunrise / Small Town Stitcher

Week Two

Monday 9/9: Hopeful Threads / Go To Sew

Tuesday 9/10: The Sewing Rabbit / Sewing Mama RaeAnna

Wednesday 9/11: Marci Girl Designs / imagine gnats

Thursday 9/12: Sew Sweetness / amylouwhosews

Friday 9/13: Lindsay Sews / 13 Spools

 Saturday 9/14: Inspire Me Grey / Angela Yosten 

Week Three
Monday 9/16: Sew Very / Craftside
Tuesday 9/17: The Littlest Thistle / CraftFoxes


9/1-9/30: Link up your craft book project at Craft Buds from your blog or Flickr account, and enter to win prizes. Winners will be announced on Tuesday, October, 1!

To participate in the month-long contest, just link up any project you've made from a pattern in a craft book. That easy! You'll tell us a little about the book, the project, how you personalized it, etc.

Rules
1) One entry per person. 

2) Your craft book project must have been completed in 2013. 

3) Create a new blog post or Flickr photo (dated September 1, 2013 or later) and link back to Craft Buds/Craft Book Month in your post or photo description. In your post or photo description, make sure to list the craft book you used and provide a link if possible.

4) All winners chosen via Random.org. Some prizes available to international winners, so please join us!


Prizes

Visit Craft Buds and link up your craft book project during the window of Sept 1-30 and you'll automatically be entered to win some fantastic prizes from the Craft Book Month sponsors!


No time to make a project? You can also follow Craft Buds all month long for your chance to comment and win some new sewing and quilting books for your library.


 Craft Book Month at Craft Buds