 |
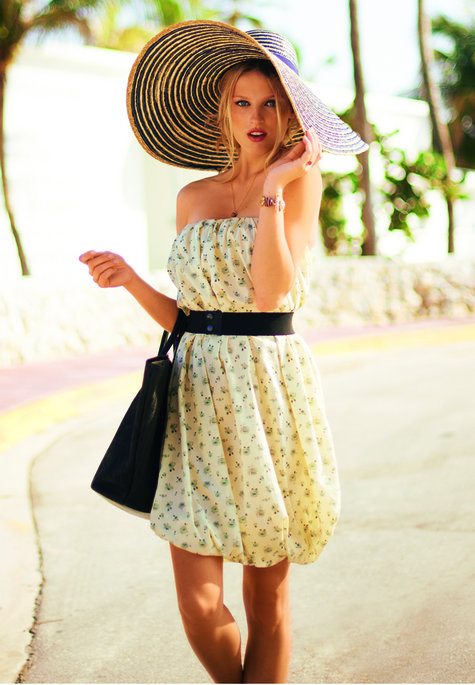
| She totally looks just like me right? Can't you just see me going to Walmart in that hat?? I wish! |
I chose to use a curtain I'd bought at Walmart for a project in Emma's room and didn't need. I figured it was a lot of fabric at a great price and I wasn't out much if it came out bad. I also used an old white sheet for the lining. I got it all cut out and went for it this morning...
Until it came time to sew up the lining. If you've never used Burda patterns, they don't come with a seam allowance, you have to add your own. I don't know why since you need it, but they don't. I chose to omit the SA (seam allowance) here because I cut it on a larger size than I actually am. Plus the dress is very blousy and I didn't want to end up with it overly large. MISTAKE. Cutting with no SA for the outer was fine, but the lining--Oh my goodness...first off, the lining had a center front, 2 side pieces, 2 side back pieces and 2 back pieces. What the heck for??? So by not including the SA I lost like 3 inches and I don't know who made that pattern to start with, but there wasn't room even with 3 inches added in! But, I just added an additional panel and moved on...
 |
| Another view of the dress from Burda... |
But then, to attach the 2 layers, they had me gather the outer shell and then baste the lining to it. Once that was basted I was to sew the lining to the SA to create a casing for some elastic (which I could never find mentioned what size or how much...I based it on my chest). So, I basted, realized that it wasn't as even as I'd like, ripped it out, basted again, questioned their judgement on this SA casing thing and kept going only to fight the elastic in this small space. I tried it on...it looked okay, but some of the basted seam was already coming undone.
So, during the Gator baseball game tonight I had a nice long visit with my seam ripper. He and I haven't hung out much lately, but I think he missed me, and obviously I can't do a project without him. I got the lining completely separated from the outer shell and I called it quits for the night.
I am determined to beat this pattern. I mean, this dress has Kelli written all over it. :) And who doesn't want to go to town in a curtain? It's so 21st century Scarlet O'Hara! I'm starting over in the morning by cutting a new lining with only a front and back piece based on my measurements and not just pieces of paper. I'm going to sew the shell and lining together with a larger SA at the top. That way I can make a casing for the elastic that will look nice and hold the dress up. (Key issues if you ask me.)
And as for the bubble hem...well the directions are a little iffy there too, so I'm going to read them well and then go with what I know. Hopefully between the two, I can get it right! ;)
I am hoping for pictures tomorrow. Wish me luck!!

Come see a dress shirt skirt!
ReplyDeleteLOVER the Burda dress! I can't wait to see what you make!
ReplyDelete